How to split a Mac screen into three windows
How to put three windows on one Mac screen: a half and two quarters with macOS 15 tiling, three columns by hand, or a three-window layout from a window manager.
Sanjeev Maharjan6 min read

The quickest built-in way to get three windows on one Mac screen is macOS 15 Sequoia's tiling: drag one window to the left edge for a half, then drag the other two to the top right and bottom right corners for a quarter each. Split View on older versions stops at two windows. For three equal columns you either resize by hand or use a window manager that has a three-column layout.
The short version: macOS 15 gives you one half and two quarters by dragging. Three columns, or a wide centre with a narrow window on each side, need a window manager. In SnapForMac you pick the layout from a bar and then choose which open window goes in each remaining zone.
Three layouts worth knowing
"Three windows" can mean different shapes. Which one suits you depends on what the windows are for.
| Layout | Shape | Good for |
|---|---|---|
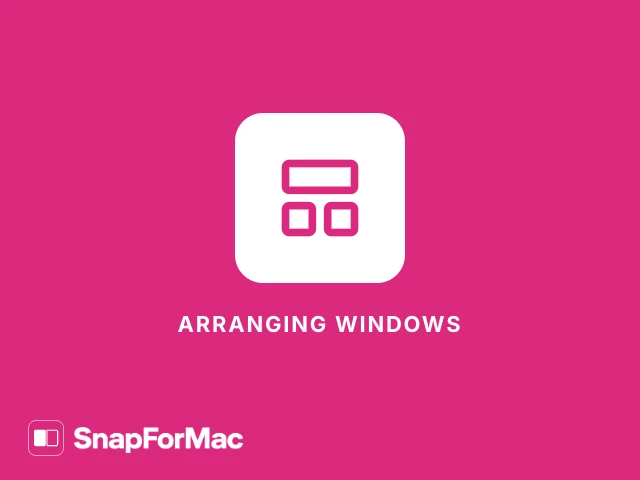
| Main and two stacked | One window on the left half, two on the right, one above the other | One main window, with two smaller ones beside it |
| Three columns | Three windows of the same width | Three windows to read across on a wide display |
| Centre and two sides | A wide window in the middle, a narrow one on each side | The thing you work on, with a reference on the left and on the right |
On a laptop screen three columns are narrow, and many apps will not shrink that far. "Main and two stacked" is usually the better fit there. Three columns come into their own on a wide external display.
With macOS 15 tiling: a half and two quarters
From macOS 15 Sequoia a window tiles when you drag it to an edge or a corner of the screen.
- Drag the main window to the left edge of the screen and let go when the frame shows the left half.
- Drag the second window into the top right corner. The frame shows a quarter. Let go.
- Drag the third window into the bottom right corner and let go.
The same positions are commands in the Window menu, under Move & Resize, so you can do it without dragging. That menu also has commands that arrange several windows at once; what is on offer depends on your version of macOS, so read the menu on your own Mac.
What Sequoia's tiling does not give you is three equal columns. Its positions are built from halves and quarters. If your Mac runs macOS 13 or 14 there is no tiling at all, and Split View holds two windows, not three. The guide on how to snap windows side by side on a Mac covers both of those.
By hand, on any version of macOS
You can always build three columns yourself: drag each window into place and pull its edges until the three fit. It works everywhere and needs nothing installed.
The cost is time. The edges rarely line up, the layout is gone as soon as you move a window, and you do it again the next day. It is fine once. It is tiresome as a habit, which is the reason layout tools exist.
With a layout picker: SnapForMac's Snap Layouts bar
SnapForMac has a bar of six layouts that drops from the top of the screen. Three of the six are made for three windows: Three columns, Main and two stacked and Centre and two sides. The others are two halves, wide and narrow, and four quarters.
There are three ways to open the bar: press Control, Option and Space, click Snap Layouts in the menu-bar popover, or drag a window to the top of the screen. Then:
- Pick a zone of the layout you want for the window in front. Click it, or press the layout's number and then the zone's number. The window moves there at once.
- The next empty zone lists your other open windows, each with its app name and title. Click one, or press its number, and it fills that zone.
- Do the same for the last zone. Press Esc at any point to stop with what you have.
The second step is the part that saves time: you never go looking for the other two windows, because the bar offers them to you. The list shows names and titles, not pictures of the windows. Pictures would need the Screen Recording permission, and SnapForMac does not ask for it.
The bar is free to use 5 times a day, and the count starts again each day. Filling the other zones of a layout does not use up more of them. SnapForMac Pro has no daily limit. There is more about the bar on the Snap Layouts page.
With the keyboard: thirds
If you prefer keys to a picker, SnapForMac Pro can step a window through widths. Press the left half shortcut (Control + Option + Left Arrow) and the window takes the left half. Press it again and it takes the left third. Once more and it takes two thirds. The right half shortcut does the same on the right.
That gives you a left third and a right third from the keyboard, or one window at two thirds with another at one third beside it. The middle column of a three-column layout comes from the Snap Layouts bar. Thirds and two thirds are part of Pro; halves and quarters are free. If you come from a PC and are looking for the same picker you had there, the guide on Windows Snap Layouts on a Mac maps one to the other.
Things that get in the way
- A window will not shrink. Apps set a smallest size for their windows. If a window cannot be as narrow as its zone, it stays wider than the zone and can overlap its neighbour. Choose a layout with a larger zone for that app.
- A window will not resize at all. SnapForMac moves a fixed-size window into its zone and centres it there at the size it has.
- The gap between windows. Snapped windows meet edge to edge by default. In SnapForMac's Settings you can set a gap of 4, 8, 12 or 16 points.
- More than one display. A window snaps on the display it is on. In SnapForMac one shortcut moves it to the next or the previous display.
SnapForMac needs macOS 13 Ventura or later and runs on Apple Silicon and Intel Macs. The download page lists the requirements and the install steps.
Questions people ask
Can Split View show three windows on a Mac?
No. Split View places two windows side by side in full screen. For three you need the tiling in macOS 15 Sequoia or later, windows arranged by hand, or a window manager with a three-window layout.
Can macOS tile three windows in equal columns?
The tiling added in macOS 15 Sequoia is built from halves and quarters, so its three-window shape is a half with two quarters. For three equal columns, resize the windows by hand or use a window manager that has thirds.
What is the best three-window layout for a laptop screen?
Usually one main window on half the screen with two smaller ones stacked beside it. Three equal columns are narrow on a laptop, and some apps will not shrink enough to fit one.
Does SnapForMac remember a three-window layout for next time?
No. SnapForMac places windows when you ask it to, and it does not save a set of windows to bring back later. Opening the bar and filling three zones takes a few key presses each time.
Is the Snap Layouts bar free?
You can use it 5 times a day without paying, with all six layouts, and the count starts again each day. SnapForMac Pro removes the daily limit and is paid once.
Written by Sanjeev Maharjan
Sanjeev Maharjan builds SnapForMac, a window snapping app for the Mac. Found a mistake in this guide? Write to [email protected].